You have ordered your courts, but now you worry about the schedule. Will construction delays ruin your opening plan? Let’s look at the real timeline to keep you on track.
Generally, installing a single padel court takes about 5 days for a new team, but this drops to 3 days once they get used to the process. However, the concrete foundation needs 28 days to cure before you start. A team of 3-4 workers can usually finish a 4-court club in two weeks.
I remember my first big export project where the client underestimated the foundation work. The containers arrived, but the concrete was still wet. We had to wait weeks while the materials sat in boxes, costing them money every day. To stop you from making the same mistake, I have broken down every stage of the process below.
What Foundation Requirements Must Be Met Before the Padel Court Materials Arrive?
A weak base ruins even the best court structure. Are you sure your concrete surface is ready to hold tons of steel and glass without cracking or sinking?
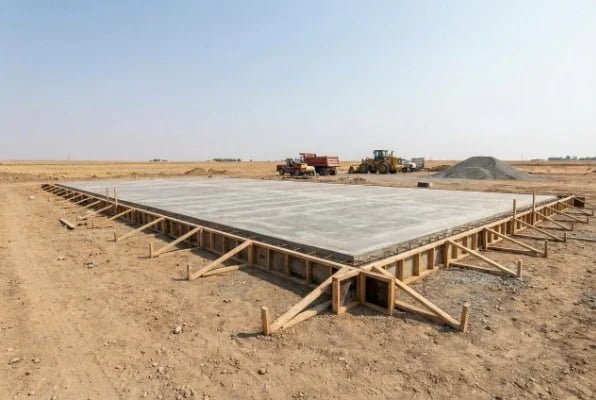
You must level and pour the concrete well before installation begins. While the actual pouring and leveling take only 1-2 days, the concrete requires a full 28-day allowance to harden completely. The surface must be perfectly rigid and flat before any steel structure work starts.
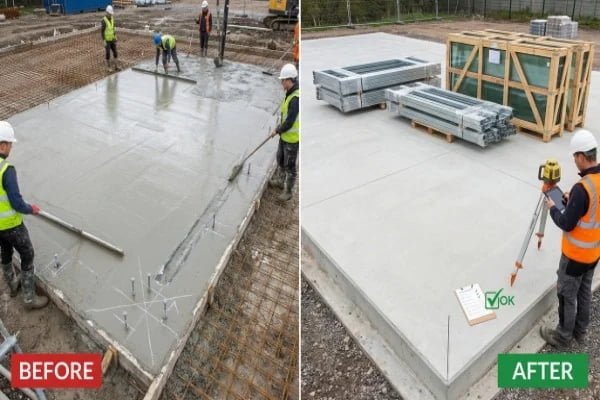
Many clients focus only on the arrival date of the container, but the clock starts ticking long before that. Based on my experience in the field, the foundation is the most critical part of the timeline. You cannot rush concrete.
If you pour the concrete and try to drill anchor bolts into it after only a week, the concrete will crack. The heavy steel columns and heavy glass panels need a solid base. Here is a breakdown of the critical foundation phase:
| Phase | Time Required | Key Actions |
|---|---|---|
| Site Leveling | 1-2 Days | Clear the land and ensure drainage is planned. |
| Pouring | 1-2 Days | Pour concrete to the correct thickness (usually 15-20cm). |
| Curing (Hardening) | 28 Days | Wait. Do not install anything. Keep the surface moist if needed. |
| Inspection | 1 Day | Check flatness. Errors here will make glass installation impossible later. |
The "28-day allowance" is a strict rule in construction. During this time, you should coordinate the shipping of your courts from our factory. Ideally, the ship is at sea while your concrete is drying. This way, when the goods arrive, you can start building immediately. Also, if you are converting an old tennis court, you might save this time, but you must check if the old slope is too steep for a padel court.
How Many Workers Are Needed and What Is the Typical Installation Timeline?
Labor costs can get high if the job drags on too long. Do you know exactly how many people you need and how many days they should take to finish?
You typically need a small team of 3-4 people. Inexperienced workers are fine if they follow the drawings. The first court usually takes 5 days to install. After learning the process, they can install subsequent courts in just 3 days each.
I often get asked if clients need to hire expensive specialist engineers from abroad. The answer is usually no. A local team of 3-4 handymen or construction workers is perfect. The key is the learning curve.
When your team starts on the first court, they will be slow. They need to understand which beam goes where and how to handle the glass. This "learning court" takes about 5 days. However, once they finish one, they become much faster.
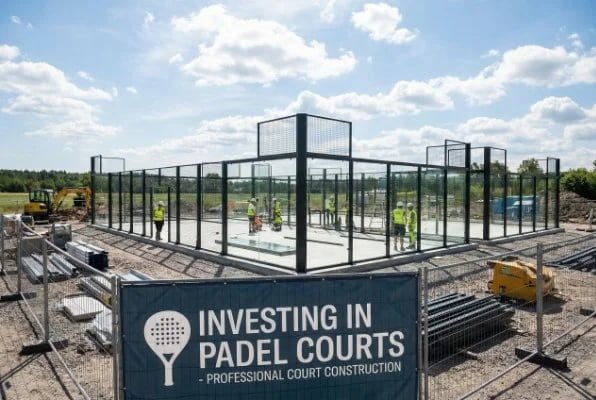
Here is a real-world calculation for a standard club project with 4 courts:
- Court 1: 5 Days (Training and familiarization).
- Court 2: 3 Days (Process is understood).
- Court 3: 3 Days (Workflow is smooth).
- Court 4: 3 Days (Maximum efficiency).
Total time: 14 Days.
If you have a larger project, say 8 courts, you might want to split the workers into two teams of 3-4 people to cut the time in half. Always plan for one or two buffer days for bad weather, especially if you are building outdoors. Rain will stop you from laying turf or using power tools.
What Is the Correct Sequence for Assembling the Steel Structure and Tempered Glass?
Installing parts out of the correct order creates dangerous instability. Are you risking shattered glass or a leaning frame by rushing the wrong steps during assembly?
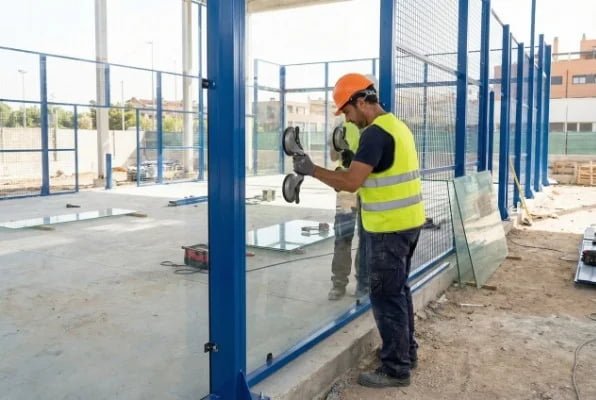
After the foundation cures, start by erecting the galvanized steel structure, beginning with the corner posts. Next, install the upper and lower beams. Then, carefully place the tempered glass using shock-absorbing sealing strips. Finally, fix the metal mesh and lighting before moving to the floor.
The order of assembly is not a suggestion; it is a safety requirement. I have seen teams try to install glass before the mesh is secure, or tighten bolts before the frame is square. This leads to problems.
You must follow this specific workflow for a safe build:
- Steel Structure First: Start with the corner posts. These are your main anchors. Then connect the vertical pillars and the horizontal beams. Do not fully tighten the nuts yet; keep them slightly loose to allow for adjustments.
- Alignment: Use a laser level. This is crucial. The frame must be perfectly vertical and square. If the frame is twisted, the glass panels will not fit, or they will break under stress. Once aligned, tighten all bolts.
- Glass Installation: This comes next. We use 12mm tempered glass. You must install the neoprene gaskets (shock-absorbing strips) on the steel before placing the glass. This prevents steel-to-glass contact.
- Metal Mesh: After the glass is safe, install the wire mesh panels.
- Lighting: Install the LED posts and lamps last on the structure to avoid damaging them while lifting heavy glass.
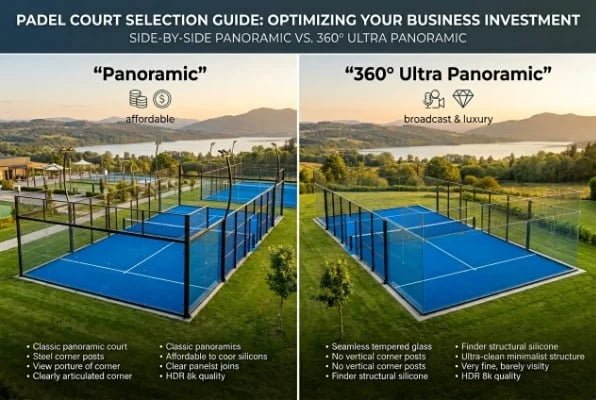
Our Classic and Panoramic courts differ slightly in column placement, but this general sequence remains the same. The steel structure acts as the skeleton; if the skeleton is crooked, the body will not function.
What Are the Key Techniques for Installing Artificial Turf and Sand Infill Properly?
A bumpy floor ruins the game and makes the ball bounce poorly. Do you know the specific sanding and cutting techniques professional installers use for a perfect finish?
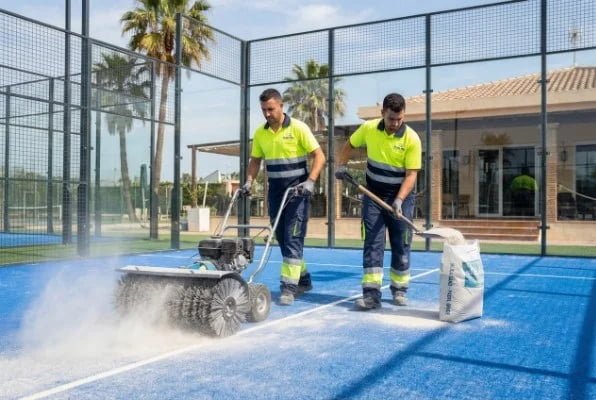
Trim excess backing from the turf first. Use a laser level to locate white lines, then join the rolls with PET connection straps and glue. Finally, fill the court with 1000-1600 kg of fine silica sand, brushing it evenly into the fibers to hold the turf in place.
The artificial turf is what the players interact with the most. It needs to be perfect. We usually use 7500 dtex turf or higher with a strong PU backing. But even the best turf fails if installed poorly.
Here are the critical technical steps my team follows:
- Pre-laying and Cutting: When you unroll the turf, there is often extra backing material on the edges. You must trim this off carefully so the seams sit flush.
- Gluing: We do not just tape it. We use PET connecting straps and a two-component polyurethane adhesive. This glue is strong and waterproof. You open the joints, lay the strap, apply glue, and press the turf down.
- The White Lines: Do not guess where the lines go. Use a laser level and chalk lines to mark the exact service boxes. You will need to cut the green turf and insert the white lines manually.
- Sand Infill: This is the most misunderstood part. You must use silica sand, not yellow sea sand. Sea sand is round and salty; it does not lock the fibers well. You need about 1000-1600 kg of sand per court. The exact amount depends on the turf pile height. You must brush this sand in layers so it sinks to the bottom and keeps the grass standing straight. If you dump it all at once, you get a beach, not a court.
What Common Installation Mistakes Should We Avoid to Prevent Future Maintenance Issues?
One small error during assembly can cost you thousands in repairs later. Are you ignoring critical safety checks that could lead to glass breakage or electrical failure?
The biggest risks are mishandling tempered glass and poor electrical work. You must protect glass corners and never let glass touch metal directly. Also, ensure the steel frame is aligned with a laser level. Finally, only a licensed electrician should connect the LED lights to the main power.
I want to save you money and stress. Over the years, I have seen clients make the same expensive mistakes. The most painful one is breaking the glass.
Tempered glass is very strong on the face, but it is extremely weak on the corners and edges.
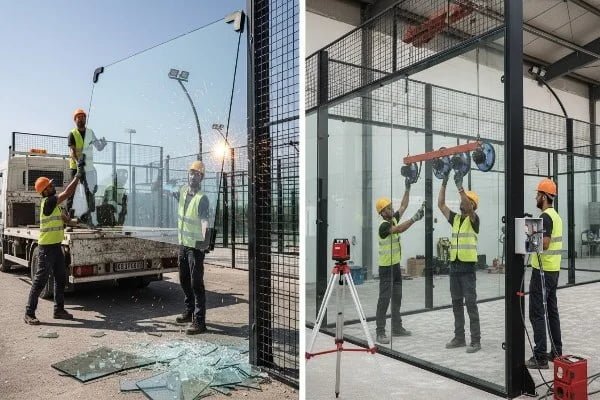
- Mistake 1: careless unloading. If you bump the corner of a glass panel against the ground or the container wall, it will explode. It doesn’t crack; it shatters into thousands of pieces. Always use rubber pads when moving it.
- Mistake 2: Metal contact. Never let the glass sit directly against the steel beam. You must use the rubber or neoprene gaskets we provide. If glass touches metal, vibration from the game will eventually break it.
- Mistake 3: The DIY Electrician. Your installation team can hang the lights, but they cannot wire them to the mains. You must have at least one person with a valid electrician’s license to do the final connection. Bad wiring is a fire hazard and can void your insurance.
- Mistake 4: Skipping the Alignment. If your steel posts are leaning even 1cm, the glass panels won’t fit into the holes. You will have to take the whole structure down and start over. Check the level constantly.
Conclusion
To summarize, allow 28 days for the foundation to cure, then plan for 3-5 days of installation per court. Precise alignment, careful glass handling, and proper sand infill will ensure a durable, profitable venue.